TL;DR: Integrating Syncfusion UI components can enhance your Microsoft PowerApps functionalities and user experience. This blog covers everything from setting up the prerequisites to deploying the Syncfusion component. It is perfect for developers looking to streamline data management and app interactivity within PowerApps.
This guide will walk you through integrating Syncfusion components into Microsoft PowerApps.
PowerApps is a Microsoft platform that enables the creation of custom business apps without extensive coding skills. Its drag-and-drop interface and prebuilt templates simplify app development, lets you connect to data sources, and integrate with other Microsoft services. PowerApps is ideal for automating business processes and boosting productivity.
Syncfusion components offer powerful, feature-rich controls that enhance your PowerApps apps’ functionality and user experience. Following this guide, you’ll learn how to incorporate the Syncfusion Grid component into your PowerApps.
Prerequisites
Before starting with the Syncfusion PowerApps Components library, ensure you have the following:
node.js (>= v18.20.4) (LTS version is recommended)
Creating and deploying the Syncfusion solution package
To use Syncfusion components in PowerApps, we need to create and deploy the solution package by following these steps:
First, clone the Syncfusion components repository from GitHub.
Then, open the cloned repository in your preferred code editor, such as VS Code.
Open a terminal in the repository’s root folder and run the following command to install the dependencies:
npm installNow, add the Syncfusion license key by placing it in the syncfusion-license.txt file in the project root folder.
Note: A license banner will appear if the component is used without a Syncfusion license key. To obtain your Syncfusion license key, visit the Get license key page.
Then, create the solution package by running the following command:
npm run packLocate the package in the SyncfusionPowerAppsComponents folder. This package contains the Syncfusion components that are ready for deployment in PowerApps.
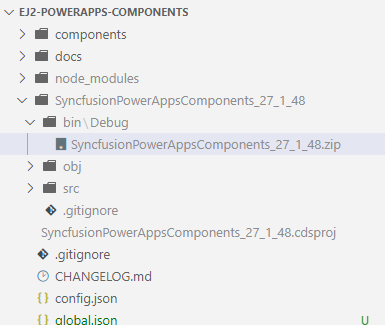
Update the Environment property in the config.json file with your PowerApps environment name. This ensures the solution package will be deployed in your target environment.
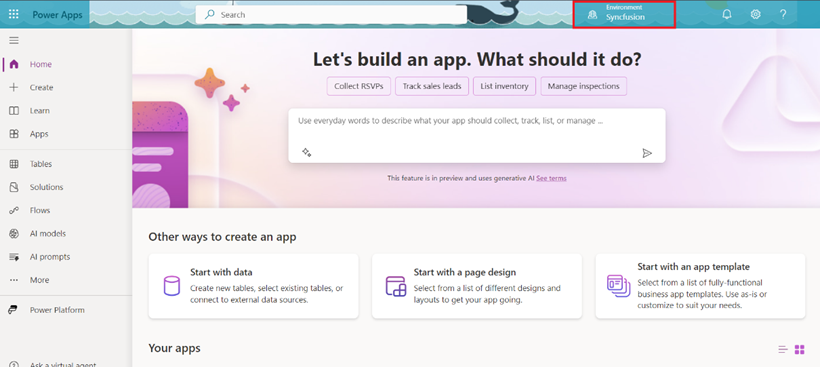
Deploy the solution package to your PowerApps environment by executing the following command:
npm run deployAfter successful publishing, navigate to the Solutions page in the PowerApps to view the imported Syncfusion components.

Creating a blank canvas app in PowerApps
Follow these steps to create a blank canvas app in PowerApps:
Open the PowerApps portal in your browser. Ensure you are in the correct environment where the Syncfusion code components solution package was deployed.
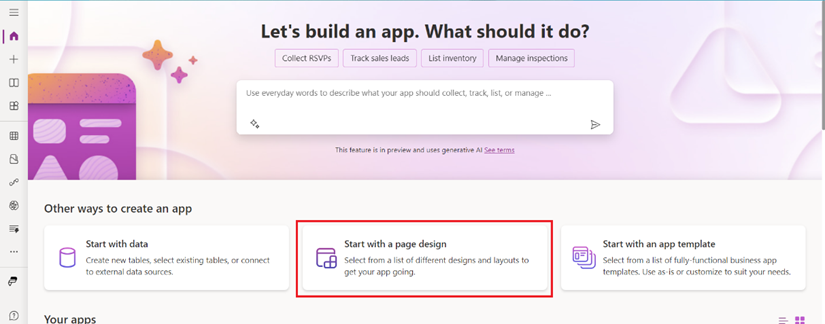
Select the Start with a page design button on the Home page. This option allows you to begin creating a new app from scratch.
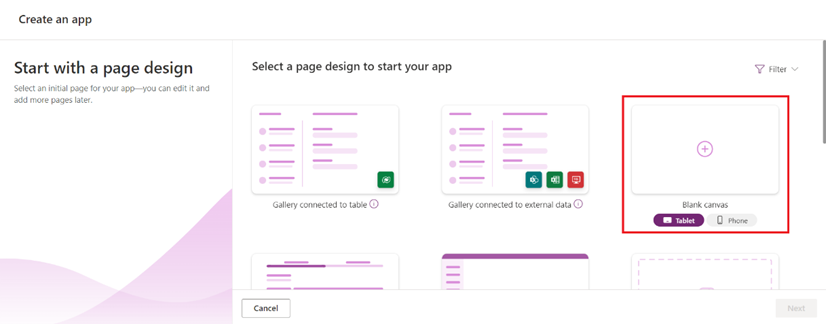
Choose either a Tablet or Phone layout, depending on the target, under the Blank canvas option from the available templates.
Now, the new blank Canvas app automatically opens in the PowerApps Studio, as shown below.
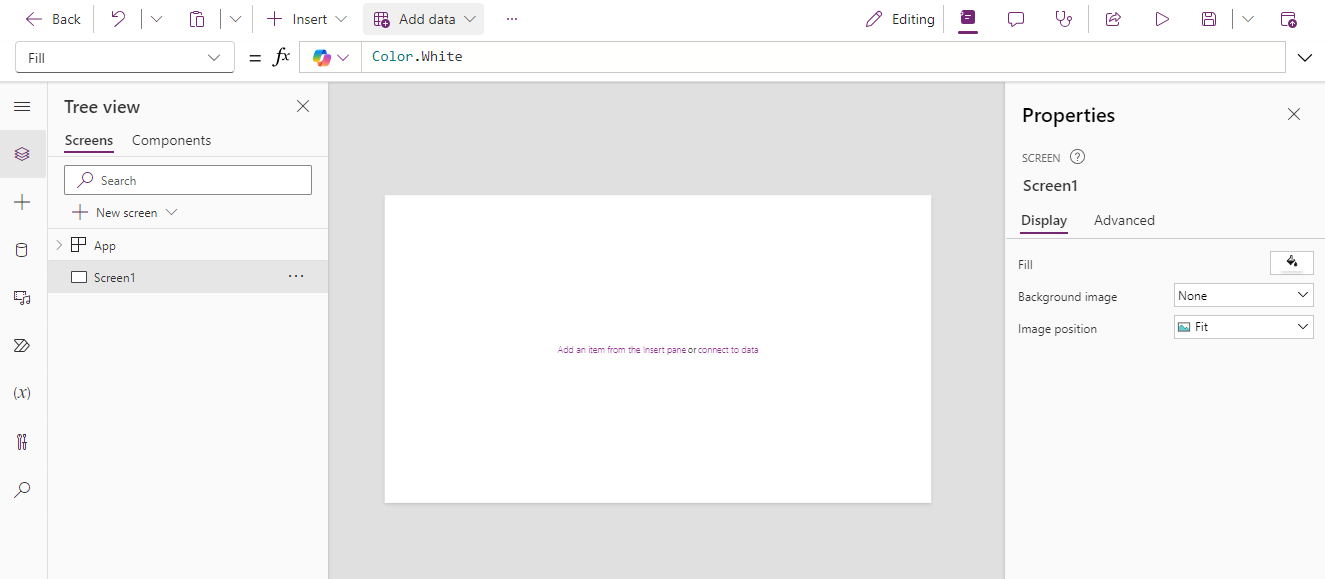
Adding the Syncfusion Grid component
Following these steps, let’s import our Syncfusion React DataGrid component and add it to the blank Canvas app we created:
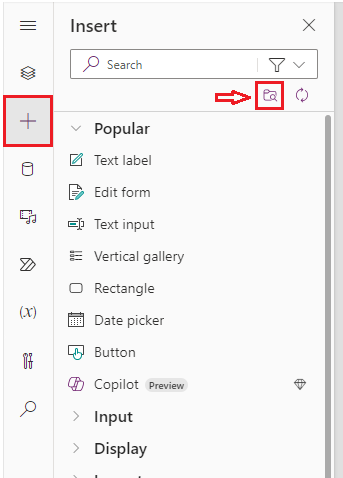
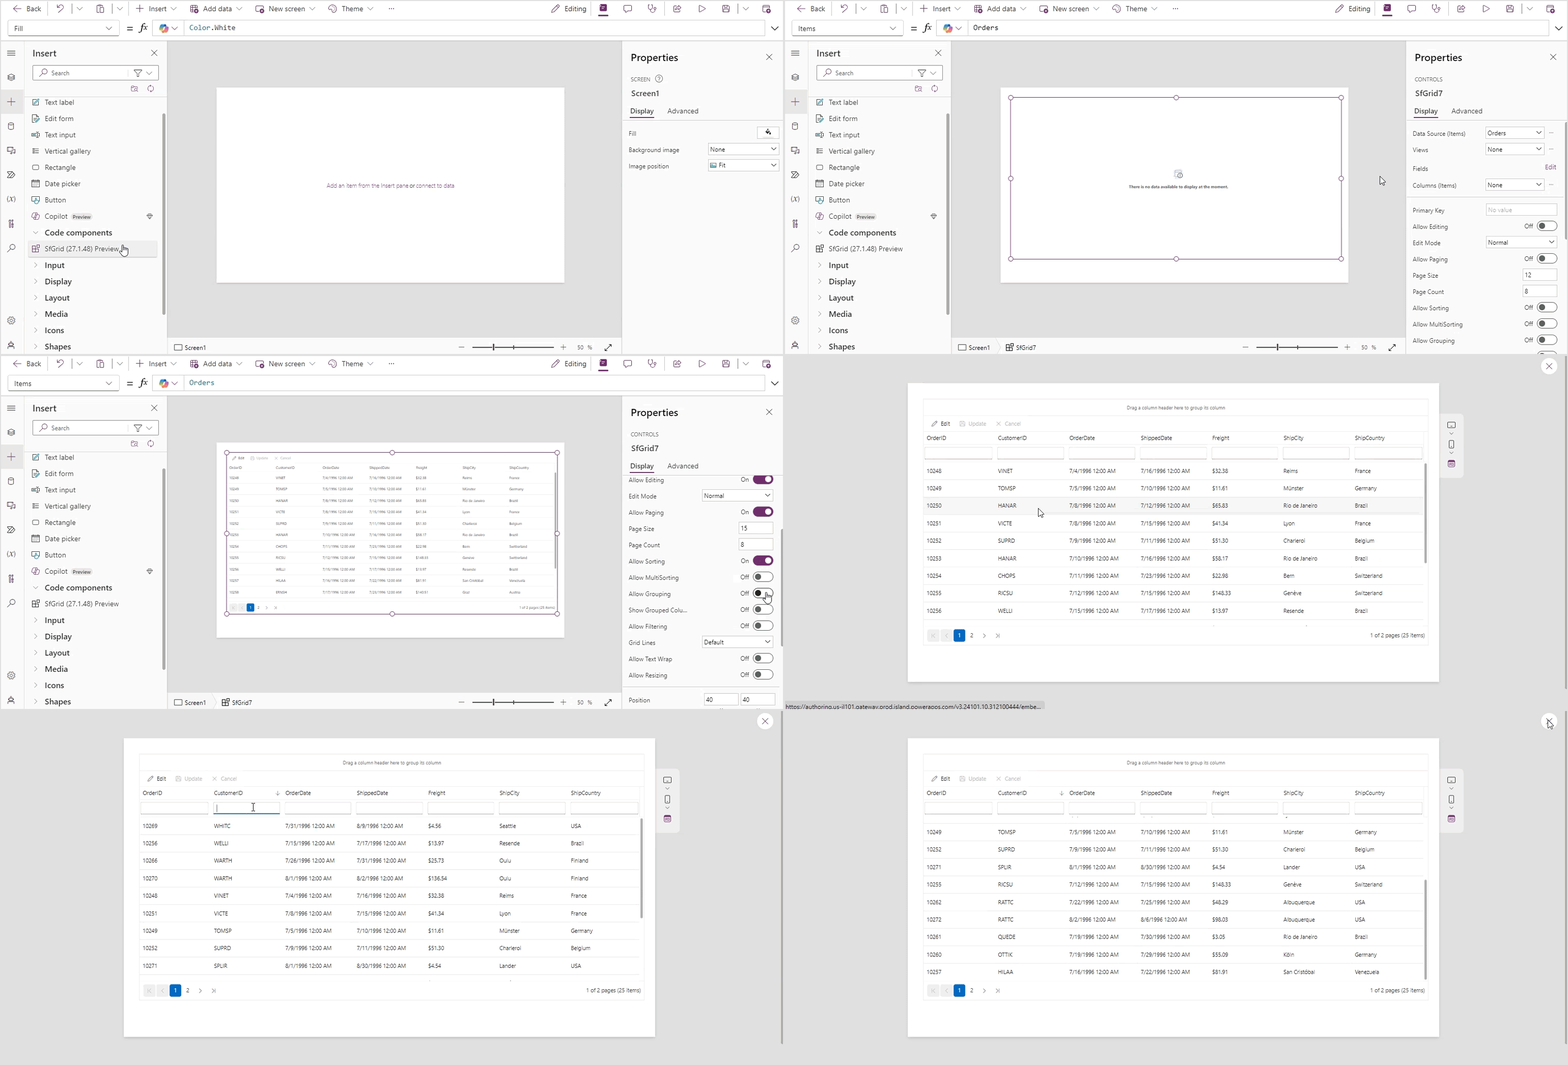
In the Canvas app, go to the Insert tab and click the Get more components option, which is in the top right corner of the Inset tab options. Refer to the following image.
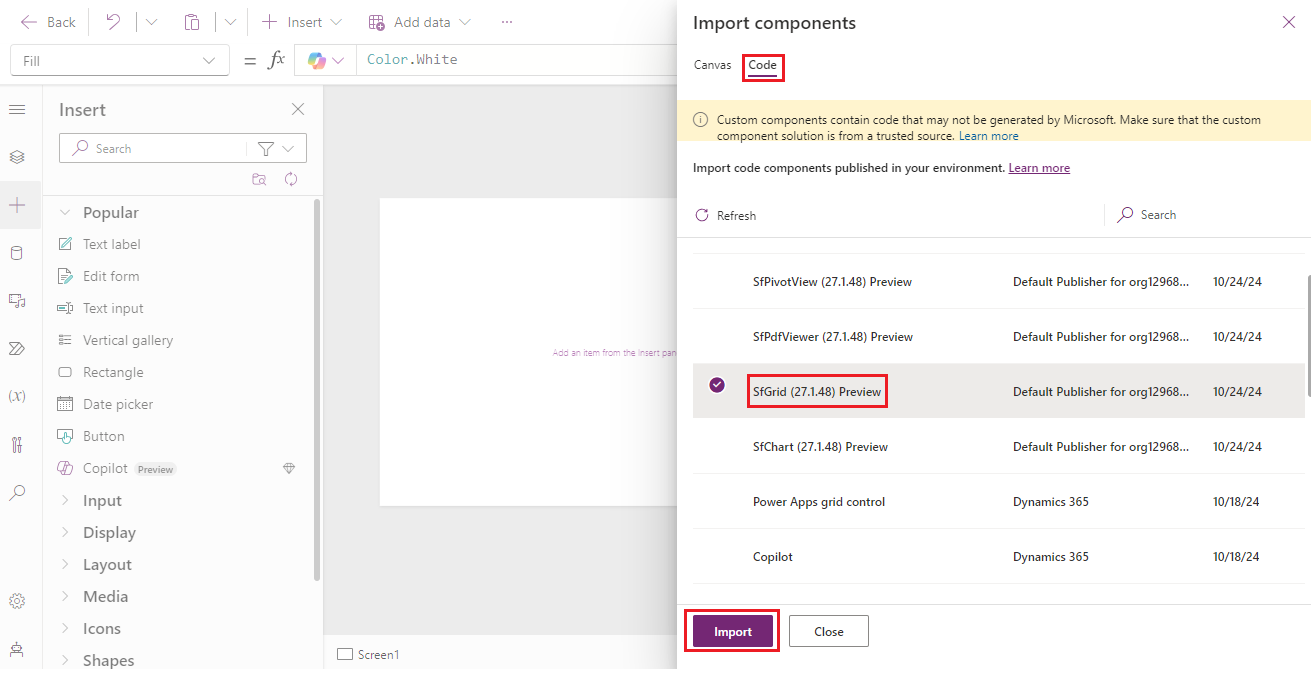
Switch to the Code tab, select the SfGrid package from the Import components window, and click the Import button.
Once imported, the SfGrid component will be under the Code components section of the Insert tab. Now, click or drag it to your app screen.
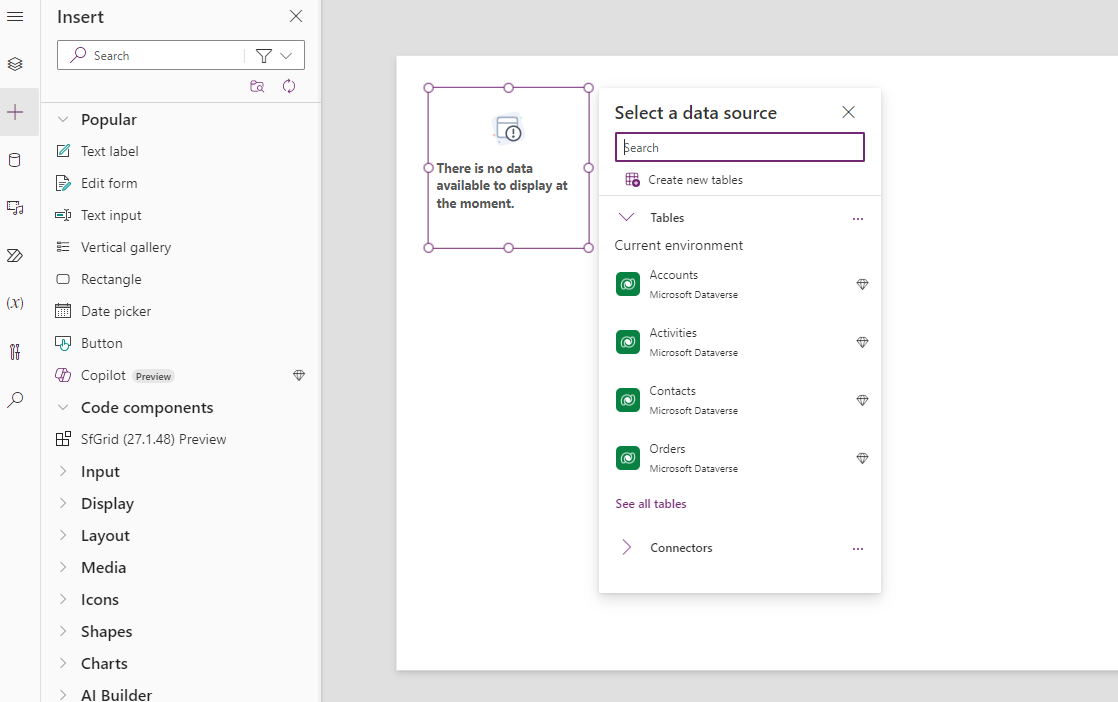
Then, configure the Grid. Select a data source, resize, and adjust the properties like Allow Paging, Allow Editing, and Allow Sorting as needed.
Previewing and publishing
Finally, let’s preview and publish the Grid on the PowerApps by following these steps:
To test your app on different devices, click the Preview button (Play icon).
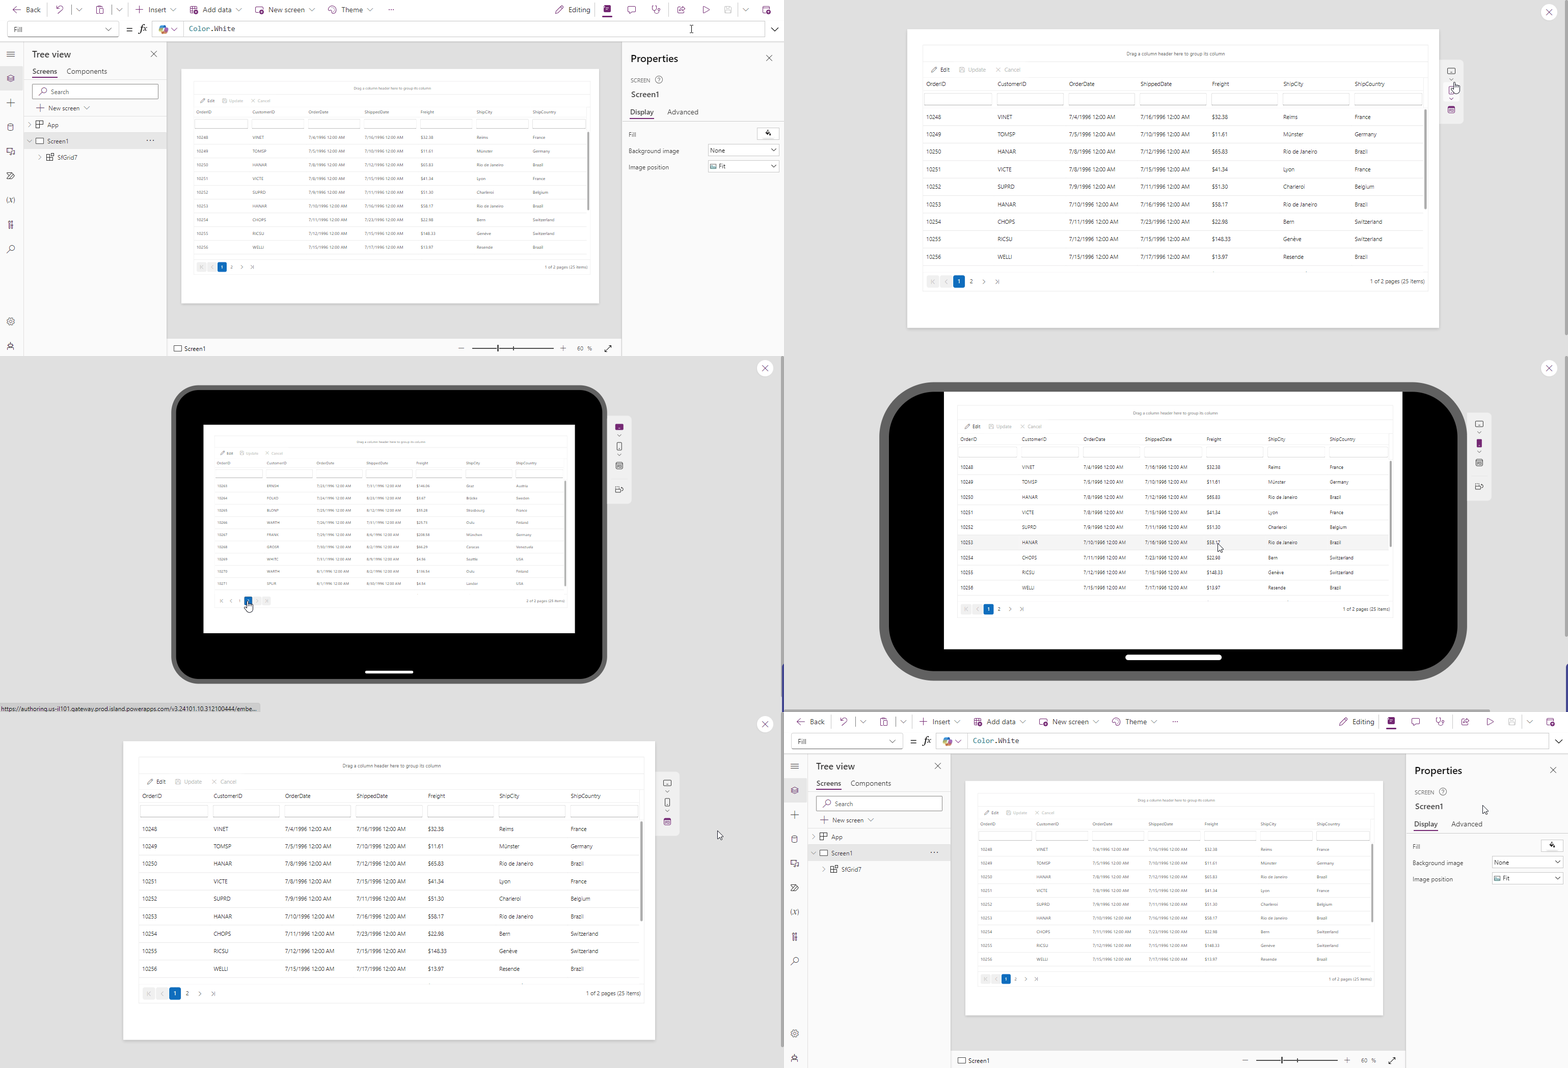
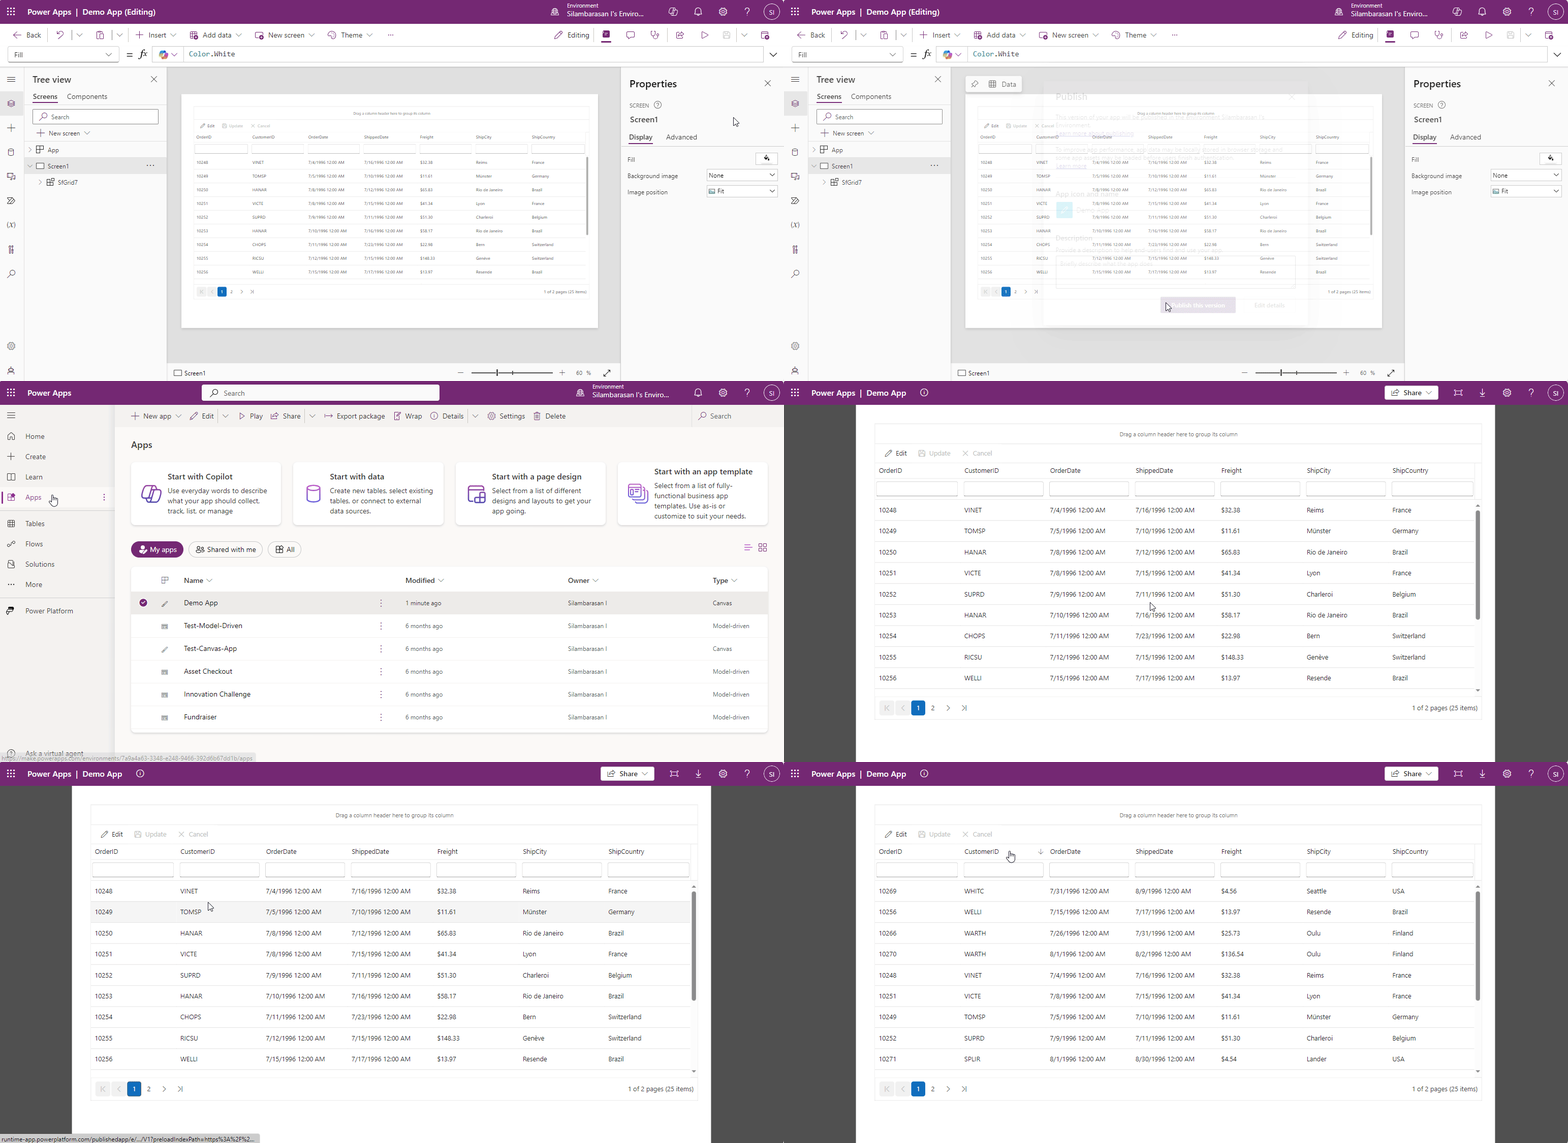
Once ensured, click the Publish button to make your app available to users, allowing them to access and use the Syncfusion Grid component.
GitHub reference
For more details, refer to the integrating Syncfusion components into the PowerApps GitHub demo.
Conclusion
Thanks for reading! By integrating Syncfusion components, you can significantly enhance the capabilities of your PowerApps applications. Explore other Syncfusion components to improve your apps’ functionalities and user experience.
If you’re an existing customer, you can download the latest version of Essential Studio® from the License and Downloads page. For those new to Syncfusion, try our 30-day free trial to explore all our features.
We welcome your feedback and questions. Need assistance? Reach out through our support forum, support portal, or feedback portal. We’re here to help you!
Related Blogs
Building Oqtane Modules with Syncfusion Components for Blazor [Webinar Show Notes]1 min read
Integrating Semantic Kernel and Syncfusion Controls [Webinar Show Notes]1 min read
Syncfusion Visual Studio Extensions Are Now Compatible With .NET 9.04 min read
Integrating Syncfusion Vue Form Components and Vuelidate7 min read
